Introduction
This is the first post in a series about moving this website from a Cpanel shared hosting provider to a Kubernetes cluster.
An easier way to run WordPress with Linode
Linode provides an easy way to create a new WordPress site by using a preconfigured virtual image. It only takes a few clicks to set up. This article explores running a WordPress pod on Kubernetes on Linode.
The choice of the service provider
I chose Linode.com as my service provider after viewing Nick’s youtube channel, called The Linux experiment. Nick sometimes does a paid promo of this company’s product on his channel. That is how I initially got to know about this service provider. My criteria for this choice were the following ones:
- Not being AWS (as I already know a lot about AWS and wanted to experiment with something new)
- A managed K8s control plane and an easy-to-create cluster.
- Volume provisioning works with Kubernetes.
- Load balancing is available.
- Running dedicated nodes is possible, but shared CPU model available to save cost.
- The service provider does not nag me.
- The price for running a load balancer (unfortunately called node balancer on Linode) and a single instance is competitive.
Linode meets all of these criteria. Since I have extensive experience with AWS EKS, I can confirm that many things are much simpler to set up with Linode LKE (Linode Kubernetes Environment). Even though Linode can provide a firewall, I do miss the VPC concept — but not having this makes things much simpler.
A Kubernetes cluster for my personal things?
Some people might say that a personal Kubernetes cluster is overkill for running things like a WordPress application. The more I think about this, the less I find this to be true. WordPress uses a MariaDB (MySQL compatible) relational database, and optionally, the memcached service for caching database queries. I could, of course, run this with a docker-compose script on an instance/Linode, but would then miss out on the many benefits that the Kubernetes ecosystem provides. Kubernetes will monitor my pods, and robustly restart them should they fail. The automatically provisioned volumes are great. Many applications packaged as helm charts are available, and are relatively easy to install if one has some devops experience. Cronjobs are available on Kubernetes. I could go on and on.
Step 1: Sign up for a Linode account
Head over to linode.com, and click on their sign-up button. Follow the instructions. I signed up with google, which removes some friction when logging in. Linode also has a $100 promotion, so that one can try the service risk-free.
Discussion: having a split DNS
I have services running on my old cluster. Navigating to https://brunzema.com/cpanel will get me to my old provider’s login page for Cpanel. I now wish to move the old blog located at https://brunzema.com/blog to the new location. The new location points to a subdomain called https://blog.brunzema.com. Another key point is that both old and new providers need to work at the same time. I can accomplish this by copying the existing DNS records from the old provider to the new provider. The following question arises: which is the authoritative server? DNS A records are glorified NAME->IP tables. If brunzema.com on the old provider DNS points to 1.1.1.1, but points to 2.2.2.2 on the Linode name server what will happen? If I wait for DNS propagation and do a nslookup brunzema.com, which IP will it return? The answer is it depends. It depends on what the authoritative DNS server is.
Step 2: Setting the authoritative name server to ns1.linode.com and ns1.linode.com
The way to change the authoritative server is with tools provided by the organization from whom you bought the domain name. I use bluegenesis.com. Once I logged into the web UI, I found an option to set the name servers, which were pointing to ns1.hostpapa.com and ns2.hostpapa.com. I changed both to point to ns1.linode.com and ns1.linode.com. This change can take up to one day to take effect.
Once I have done this, I must make sure that the A record for brunzema.com is present and has the same IP address as the one in my old provider’s DNS record. If this is not the case, the system will not resolve the name brunzema.com and the site is out of commission. Besides A, AAAA records, there are MX (mail records) CNAME (canonical name) records – essentially a name pointing at another name, and TXT records (a name that maps to user text). You will need to transfer all the records from the old UI to the new one. On some DNS servers, there is a protocol that permits copying entire zones. Most service providers turn this feature off, as it is a security risk. One can write or get a program to do this, or just do it manually.
Step 3: Manually transfer DNS records from your Cpanel(old hosting) to your Linode DNS manager (new hosting provider)
As explained above, you will need to do this step to make sure that services running on the old service provider still continue to work. I first log into my old provider’s Cpanel web application. My Cpanel, call this the Zone Editor. Open it, and it will list your domain(s). Click on manage to reveal the recordsets for that domain.
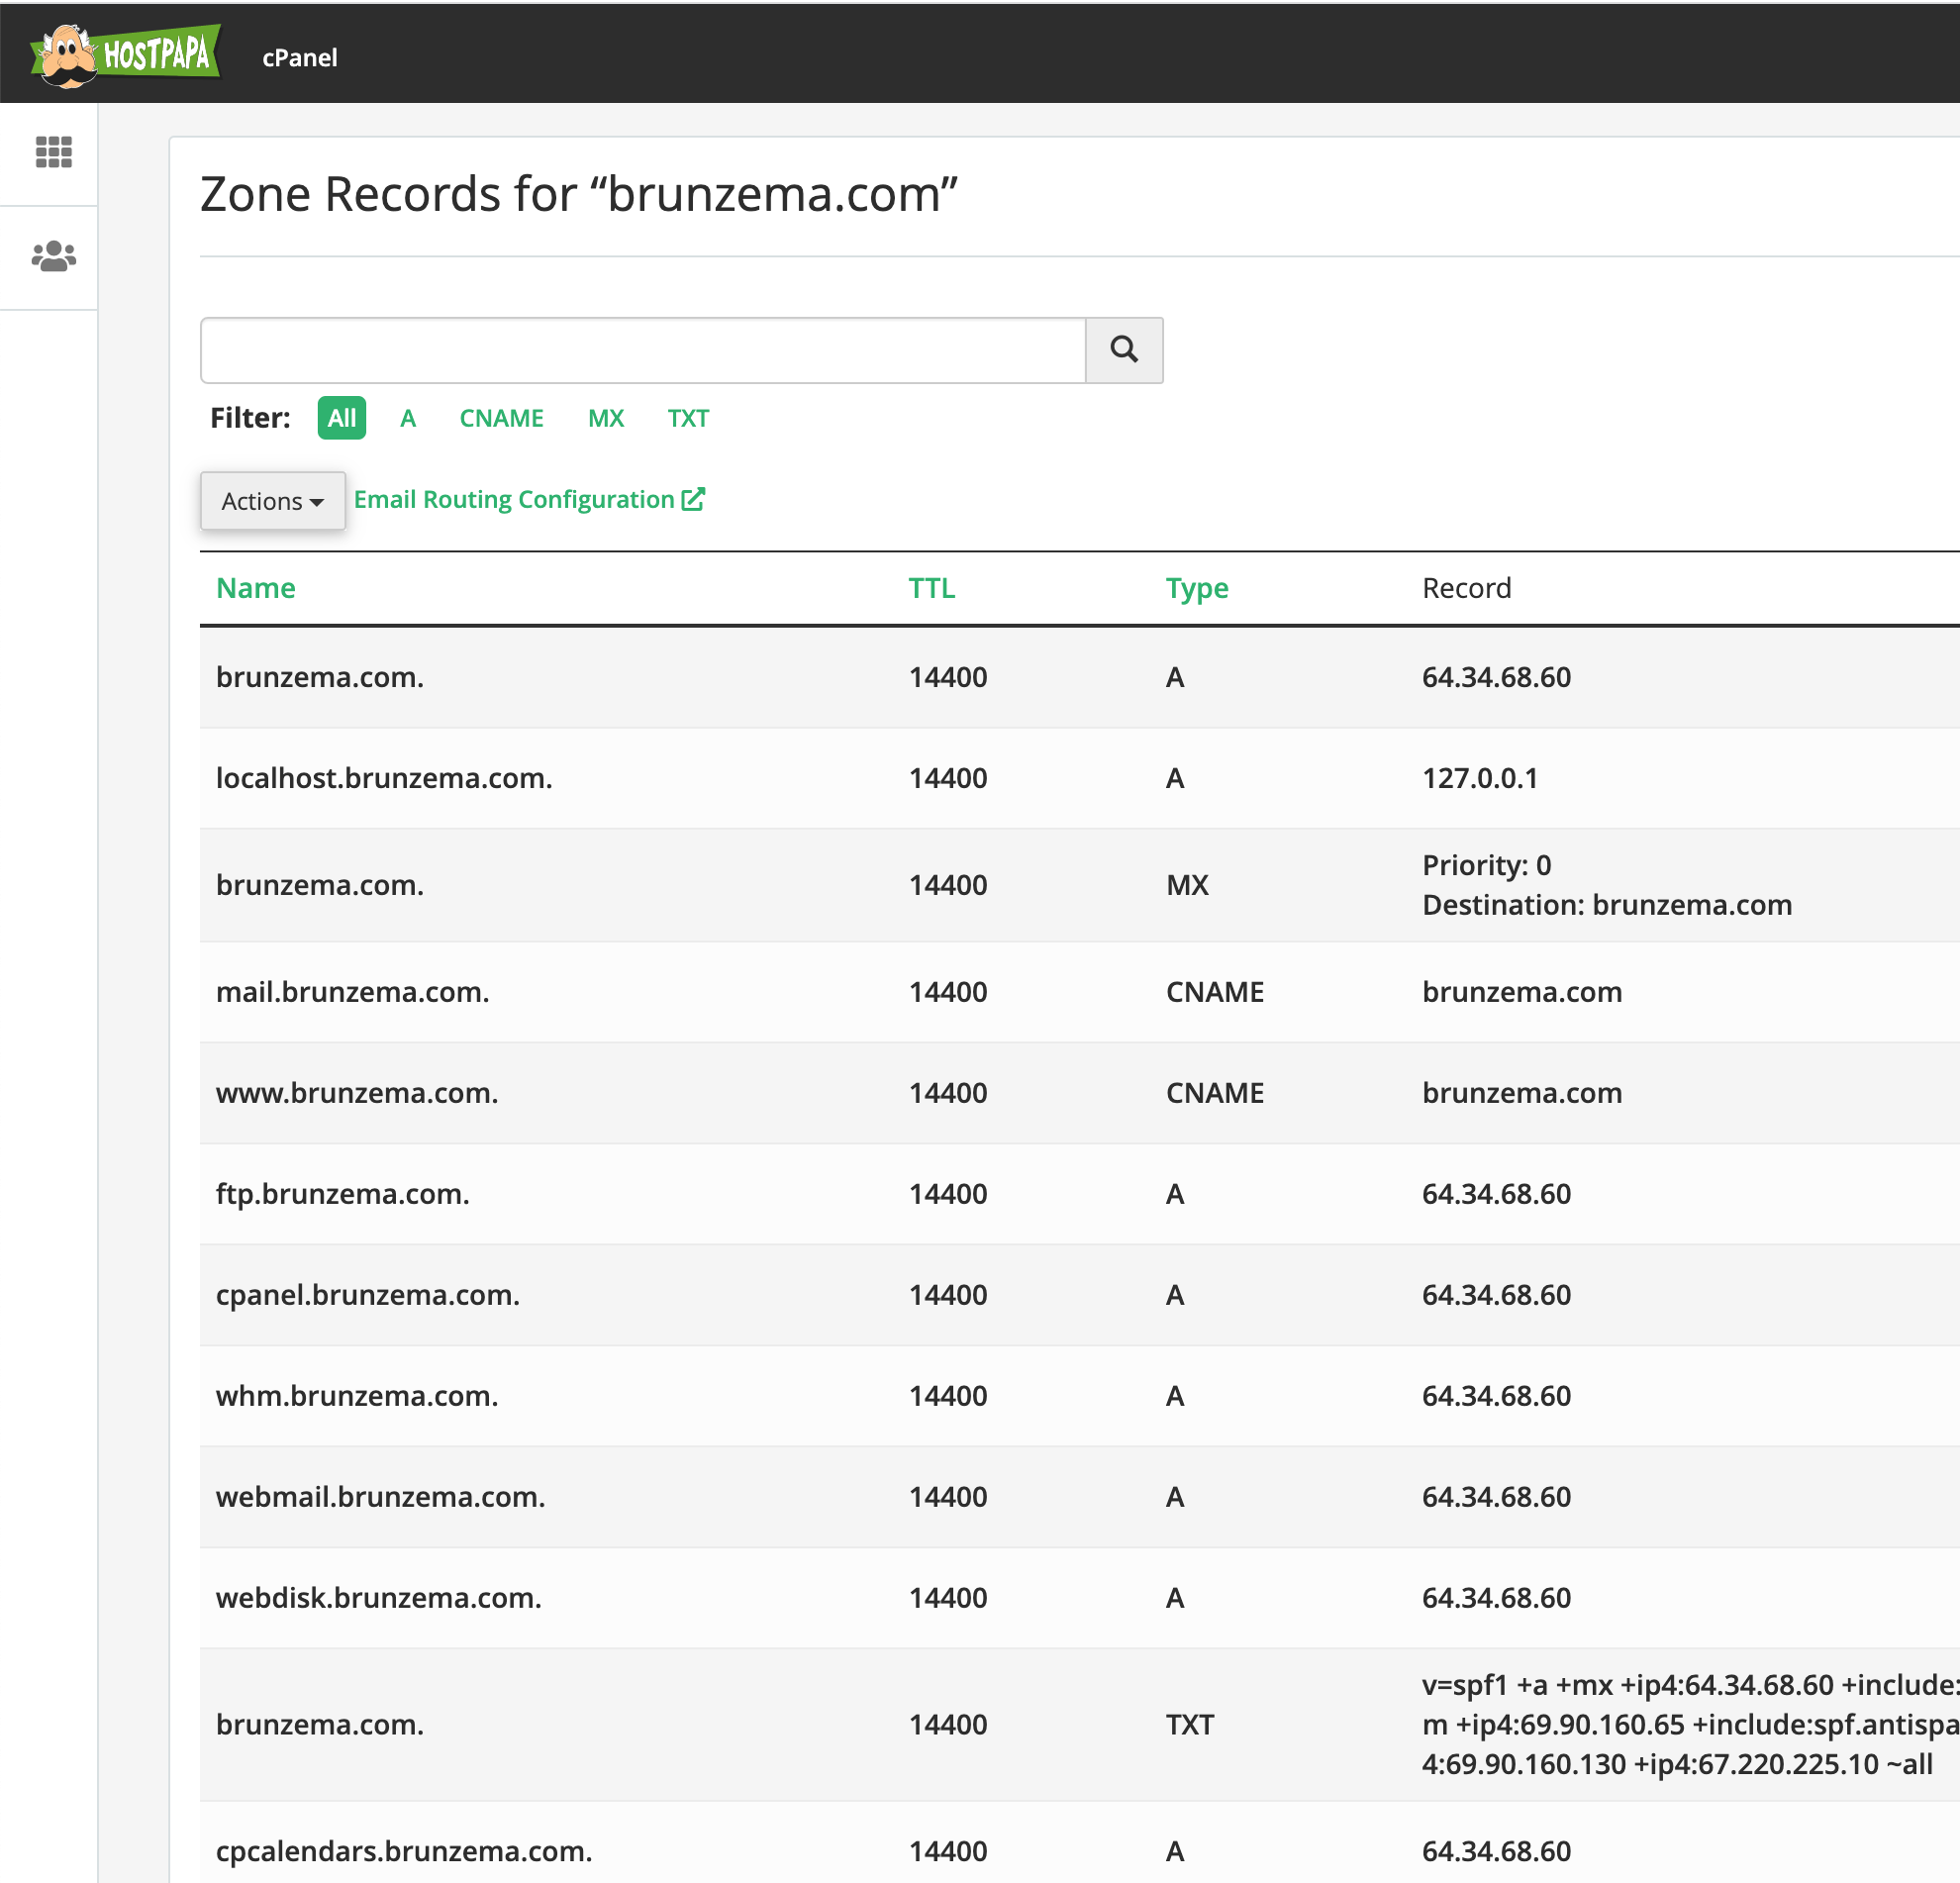
Pay attention to Name, TTL (time to live, which is in seconds here, 14400=4h), Type, and Record.
Now it is time to create your domain using the Linode domains manager UI.
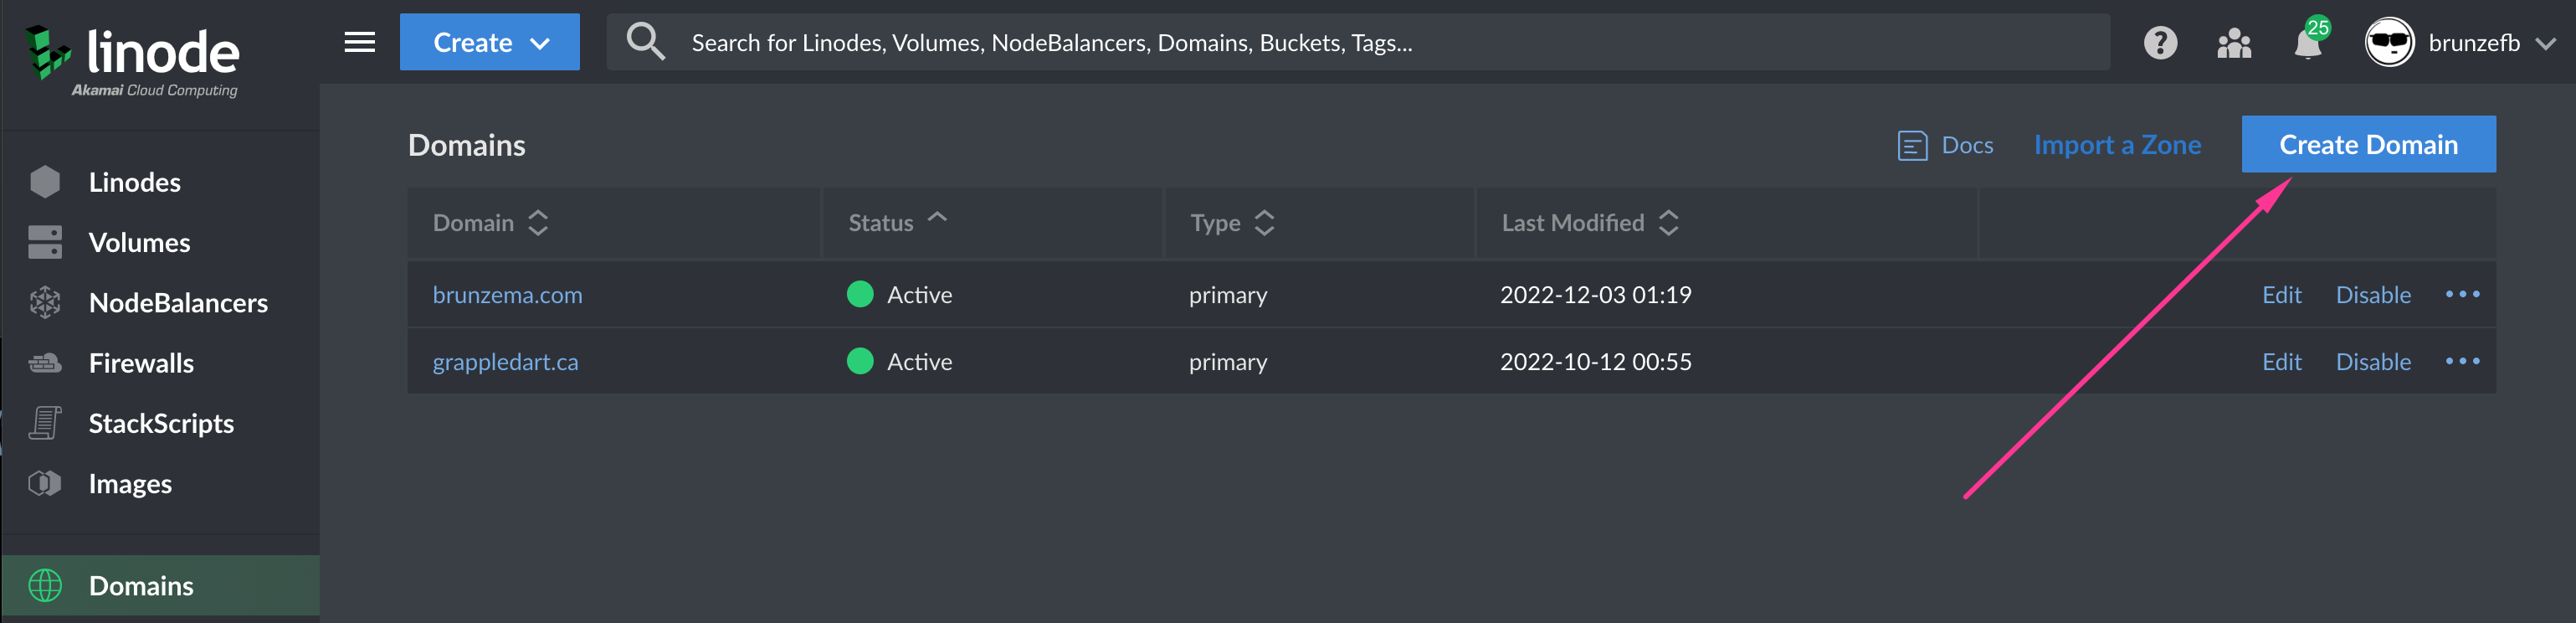
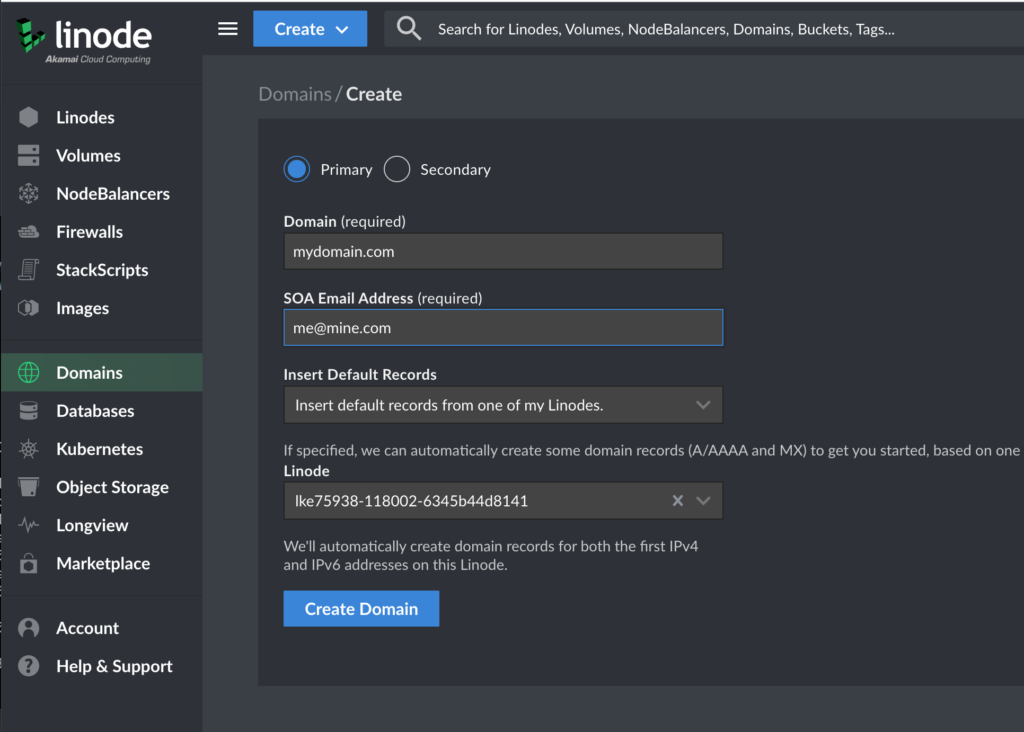
Click create. Then click the hyperlink to edit the domain.
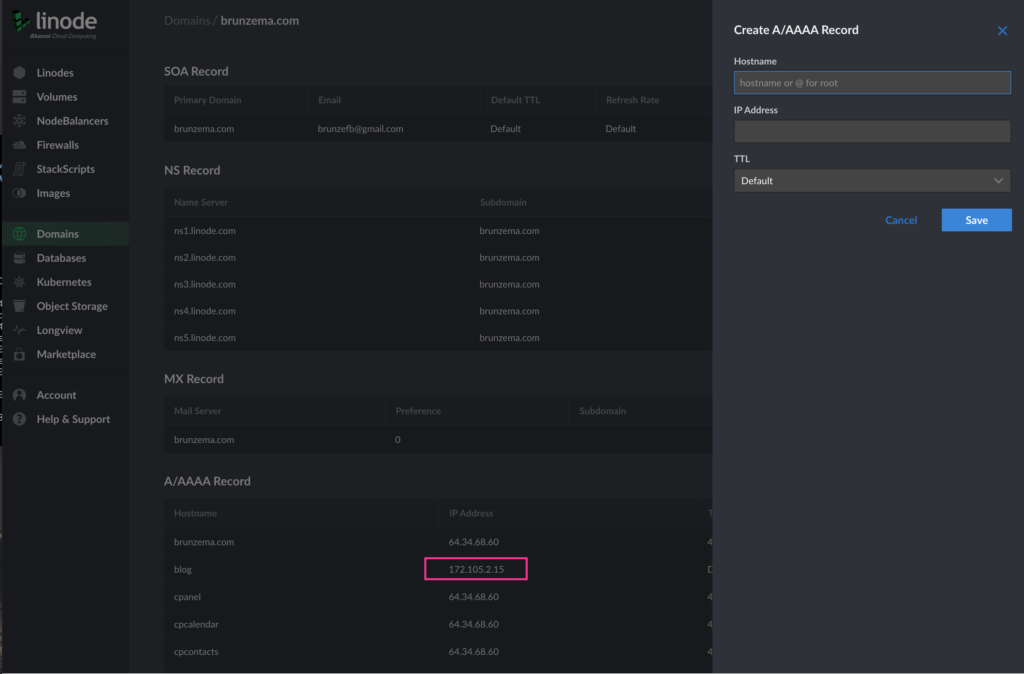
You will note that the blog has a different IP address (pointing to a node balancer). This enables pointing a name at either a resource hosted on the old provider or hosted on the new provider.
CAUTION:
Your old ISP has the freedom to reboot its servers or change IPs. When they do that, your main website IP is likely to change. This does not matter, because the ISP’s DNS is aware of the name. Normally it is the authoritative server, and the change causes no issues. If you have copied the DNS records to your new provider’s DNS and set your new provider as the authoritative server, the automatic updated will not work. Old services will then not work until we fix the DNS record. Oftentimes the servers have static IP addresses, and then things are OK.
Step 4: Create your LKE cluster
This could not be simpler. The UI for creating a cluster is brilliant in its simplicity.
Choose the 2GB shared CPU node, select 1 as the node quantity, and click Add. Click “Create Cluster”. Wait for a few minutes. Done! This will cost $10/month once your free credit has expired.
Step 5: Connect to your LKE cluster
You will need to install a version of kubectl that matches the cluster version on your desktop computer. Install instructions are available on the internet and vary by platform, so I will not cover this here. I plan to do a youtube video about creating a devops tooling container early next year. The linode documentation for step 2 and 3 is very readable and very useful and explains things in detail. Click the Download kubectl.yaml file to get the k8s-kubeconfig.yaml. Run the following in your terminal:
export KUBECONFIG=~/Downloads/k8s-kubeconfig.yaml
After this,
kubectl get nodes
should work and show one node.
Step 6: Create a Nodebalancer
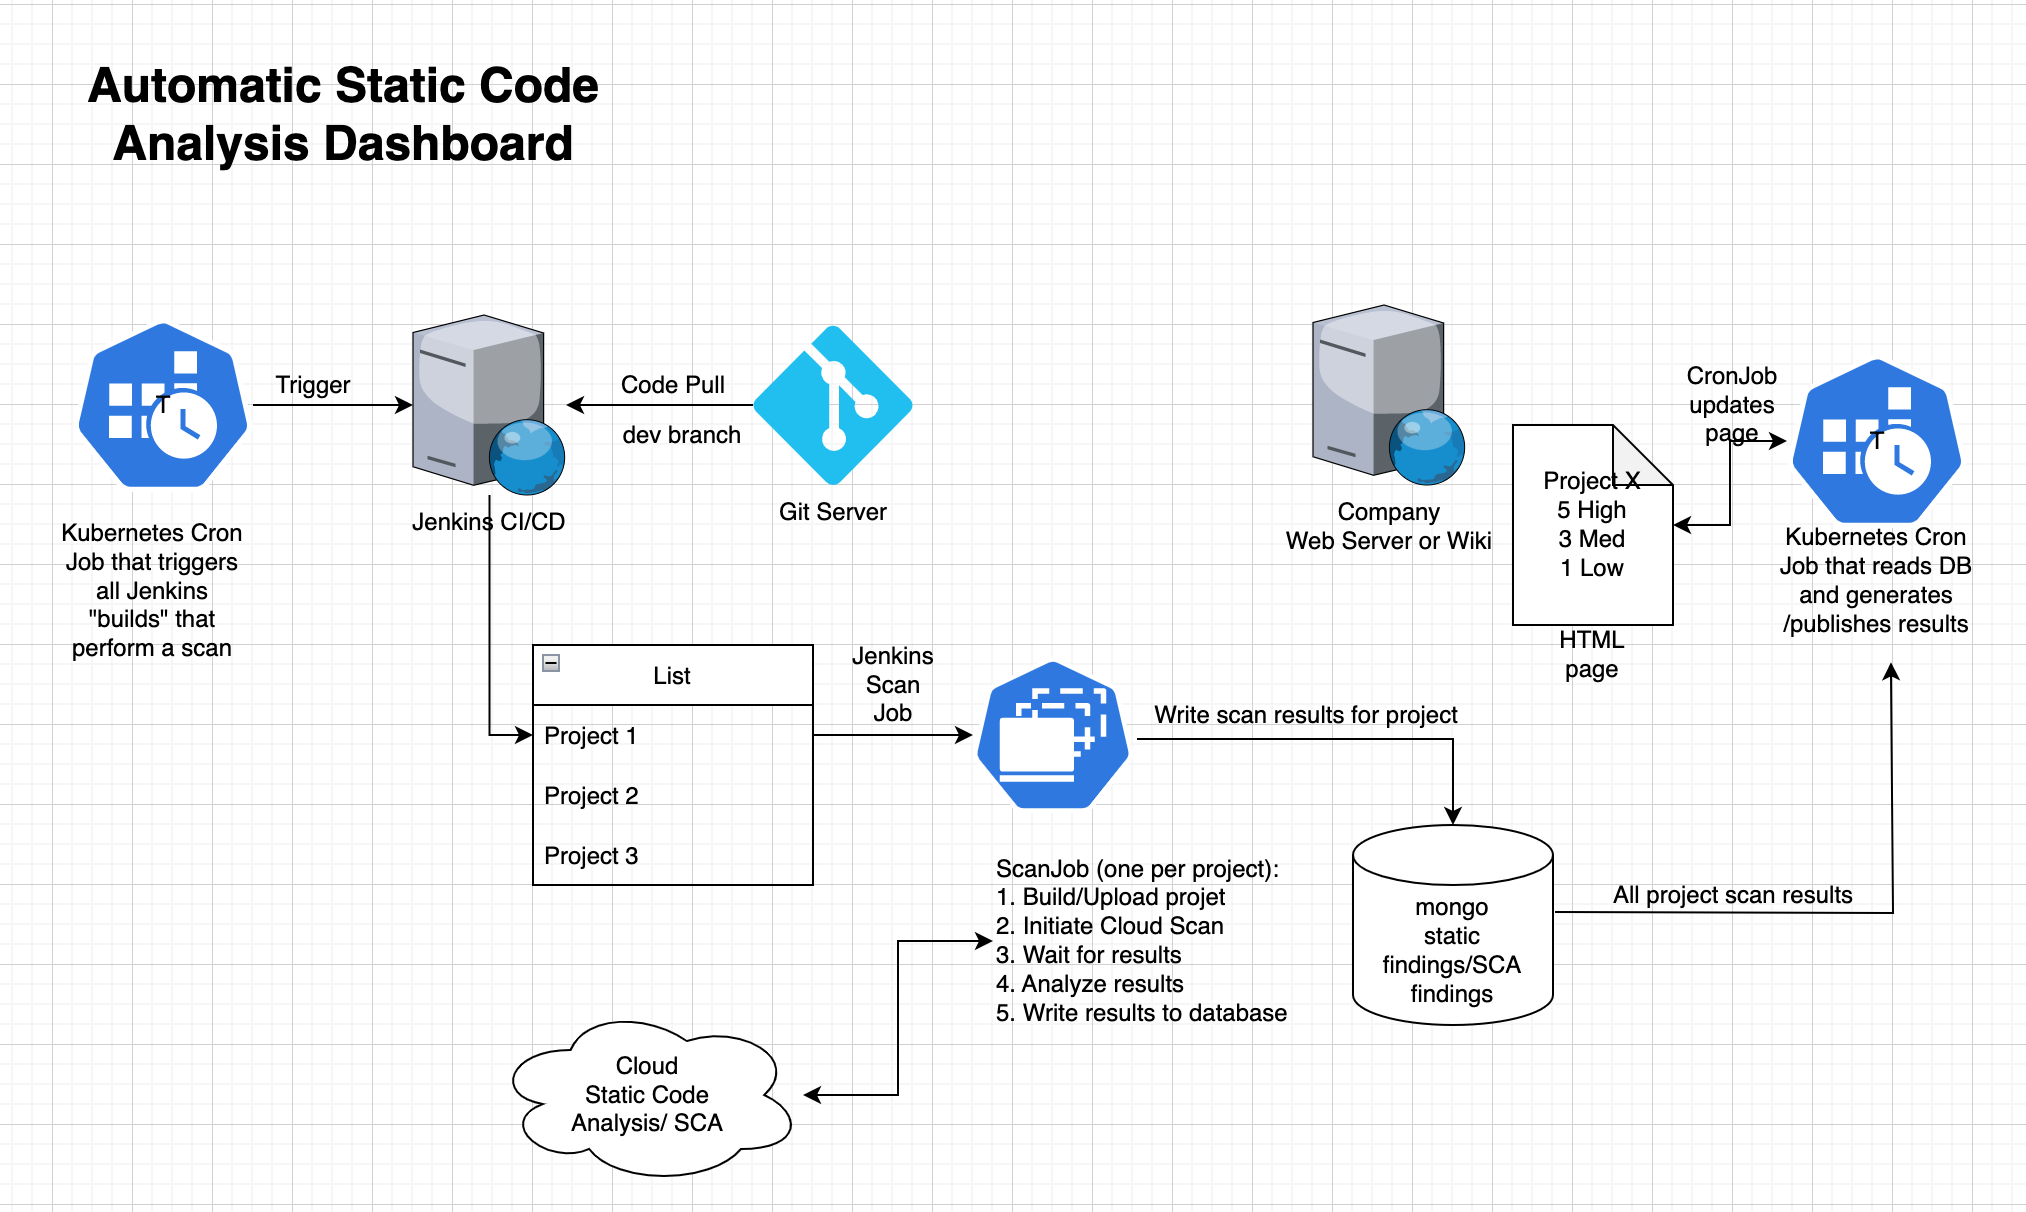
Follow the instructions to do this. Our ingress architecture will look like this:
DNS (resolves to node balancer) -> node balancer -> Nginx-ingress-controller (TLS termination)-> Service -> WordPress Pod-> WordPress container.
Finishing up for now…
Unfortunately, this is just the beginning of the journey. To summarize what I did so far: I have created a Linode account, an LKE (Kubernetes) cluster, connected to it. After creating, we now have a node balancer which is an ingress prerequisite. All the above work is part of the required infrastructure.