Introduction
Until recently, Linode hosted my WordPress blog and an older, inactive website. As a DevOps enthusiast, Linode’s Kubernetes offering intrigued me. However, to implement TLS in my ingress, I needed a managed control plane setup with a 2GB RAM, single-core node. I also needed a load balancer (or “node balancer” as Linode calls it) and some persistent storage. Consequently, running this cluster cost me around US$32 per month.
When my son upgraded his computer, I seized the opportunity to set up my own Kubernetes cluster at home and make it internet-accessible. I enhanced the computer with 64GB of RAM, a 2TB SSD, and an 8TB data-center-grade hard disk. The machine, powered by an AMD 6-core CPU (2 threads per core) and a high-quality graphics card (which is somewhat overkill for a server), can comfortably run a cluster with any services I might want to experiment with. If I ever need more CPU power, I can simply add older, less powerful laptops or PCs as nodes.
This blog post chronicles my journey of setting up this home Kubernetes cluster. Despite my extensive DevOps experience, I encountered some challenges, which I aim to share and document here.
If you only want a wordpress site, it is way simpler to to use a managed service, rather than rolling your own kuberntes-based site. However, this is a good learning journey, and you end up with complete control over the configuration and performance of your site. Much configuration needs to be correct, for this to reliably work. But once you have WordPress running on your own cluster, you can add any internet facing server using the principles you have learned.
DNS
Lets talk DNS for a second. If you do not already have a domain name, many registrars are available that will sell you one. Once you have bought a name, you typically get access to the registrar’s management interface.
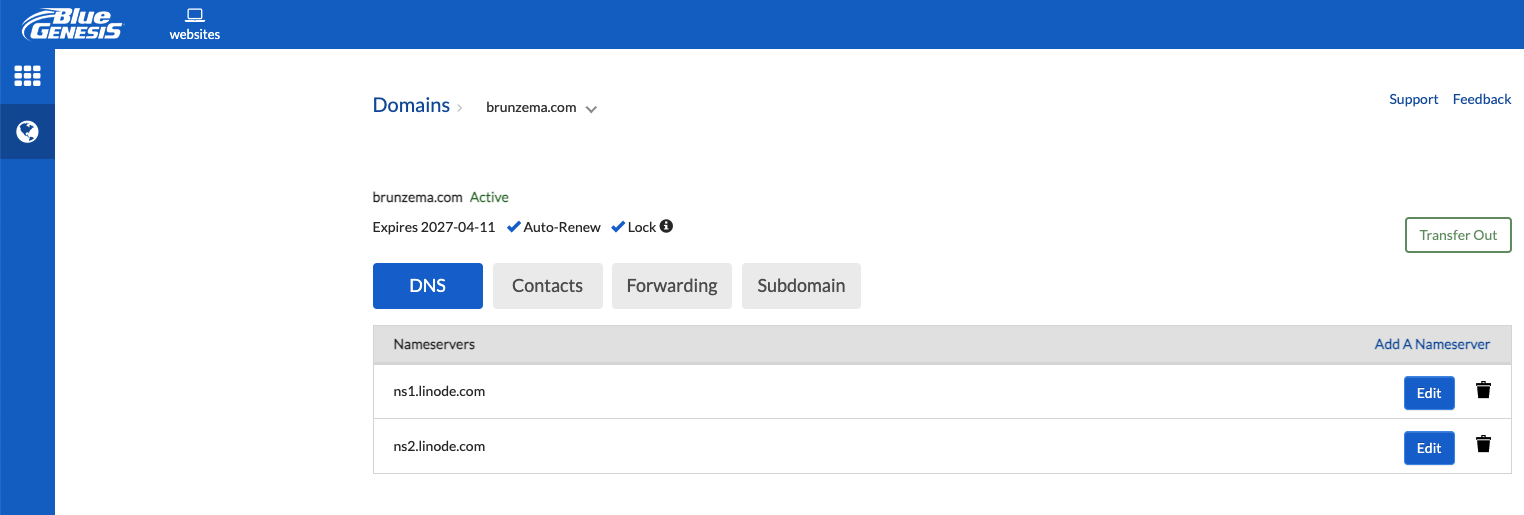
Above is my registrar’s interface. Somewhere in the UI, there will be a place to specify the authoritive DNS server that manages the domain, or there will be a way to add records to your name’s zone directly. In my case, the registrar simply points to ns1 and ns2.linode.com – the DNS servers for the cloud provider linode. You can also get an AWS account, and buy a domain via AWS’s associates registrar for the top level domain. Once its verified, you can use the Route53 functionality to manage dns records.
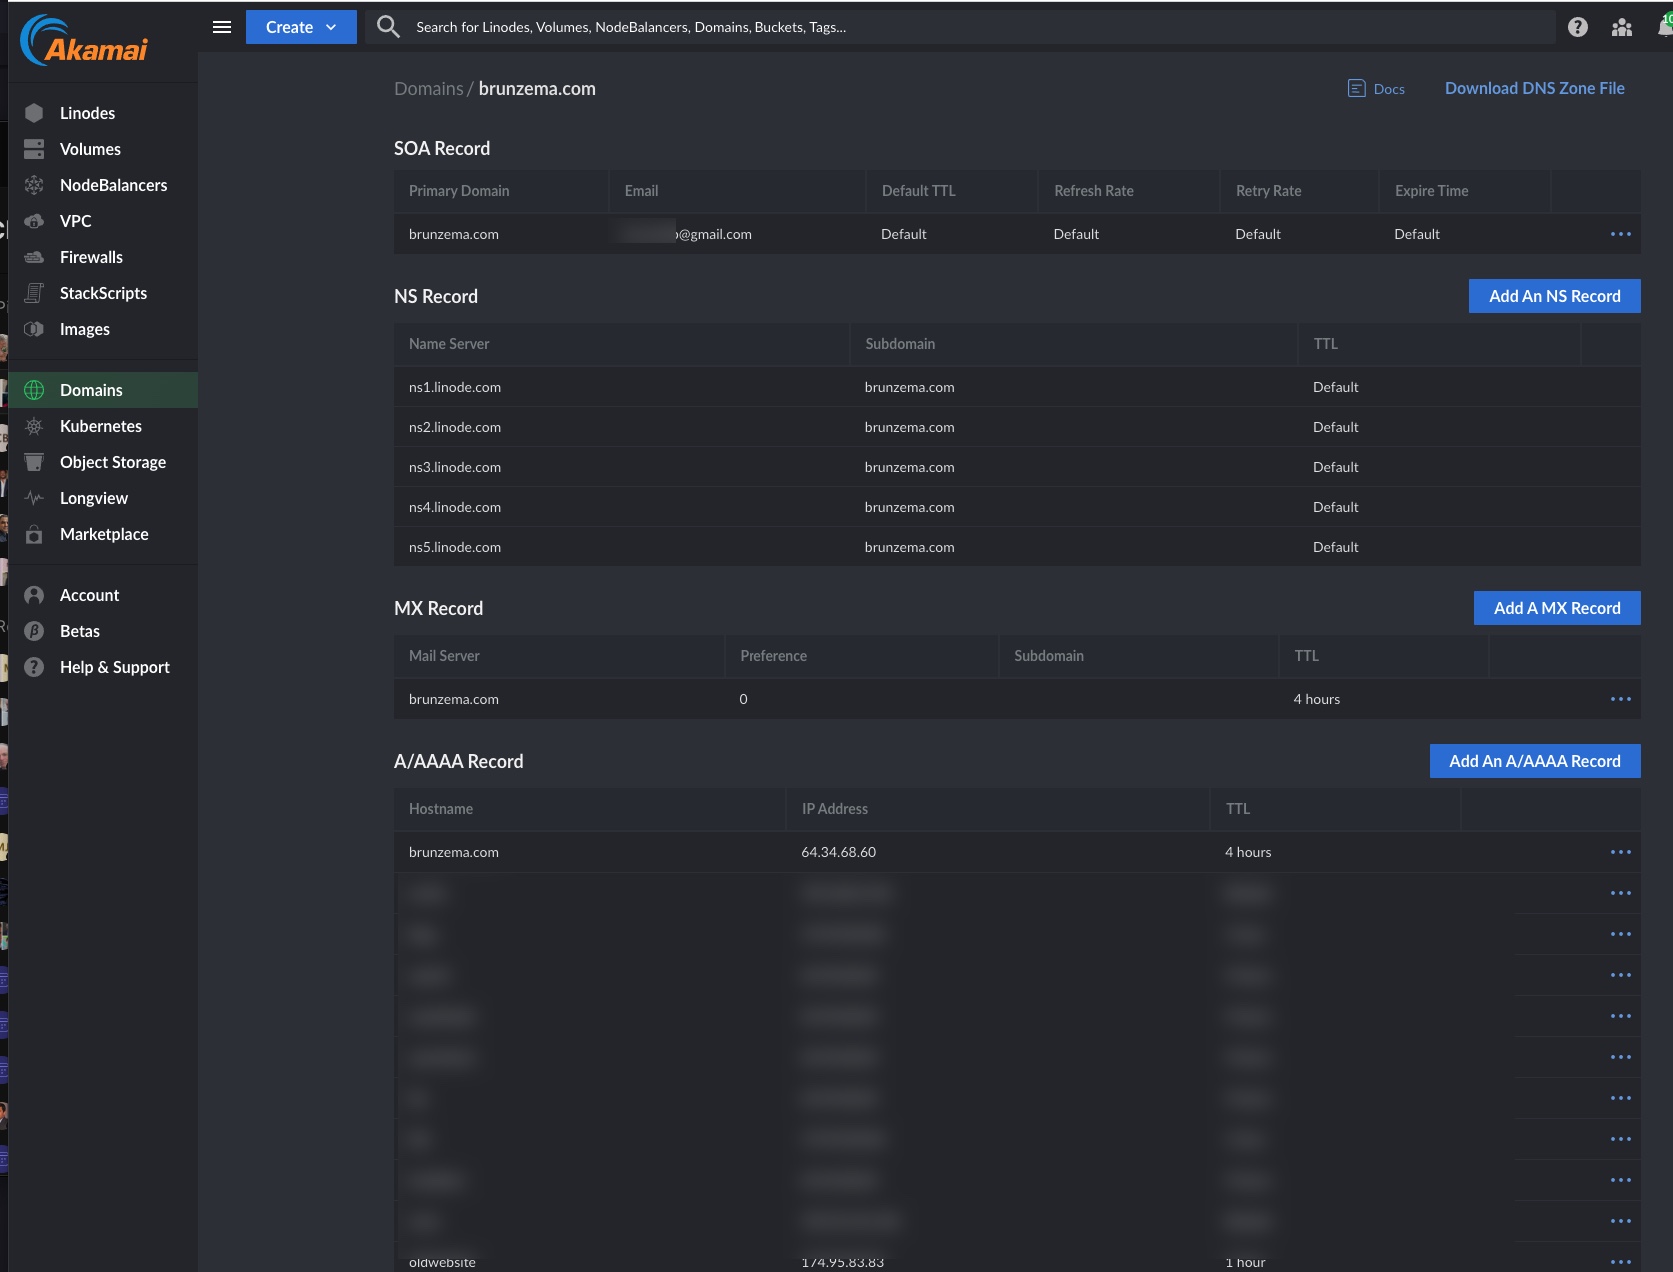
The UI above is where I manage the DNS records for my domain. I have a record called blog.brunzema.com, and it currently points to 174.95.83.83. You can get the current IP address for my blog by running dig or nslookup blog.brunzema.com in a terminal window. The above address is dynamic — it was assigned to my router by my ISP, Bell Canada when the router booted. So if my router reboots, the IP changes, and that DNS record will no longer resolve to my host machine. This is obviously a problem…, so read on.
Problem #1, getting a static IP address
You can request a ‘static’ IP address from your ISP, which typically incurs an additional cost. For example, as a Bell Canada subscriber, obtaining a static IP requires switching from a consumer to a business internet plan and paying $50 per month just for the static IP. (or $20 after a discount). The static IP is a single address that the ISP guarantees will remain constant, even through router reboots and possible service outages.
Using Dynmic DNS (DDNS)
Before deciding on a static IP, I investigated using Dynamic DNS (DDNS) on my router. Many router firmwares include this feature, which automatically alerts a DDNS service when the router’s IP address changes. Typically, the router’s software is set up to work with DDNS providers. These are websites that ‘broadcast’ these changes to other parties that need to keep up-to-date with the router’s current IP address.
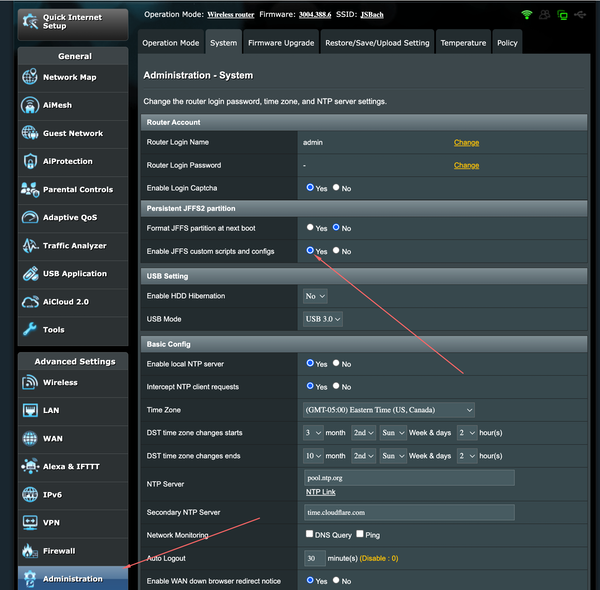
I own an Asus wireless router (with Merlin Firmware), and here’s what I needed to set up DDNS. The first screen indicates that you must grant permissions for a persistent jffs volume.
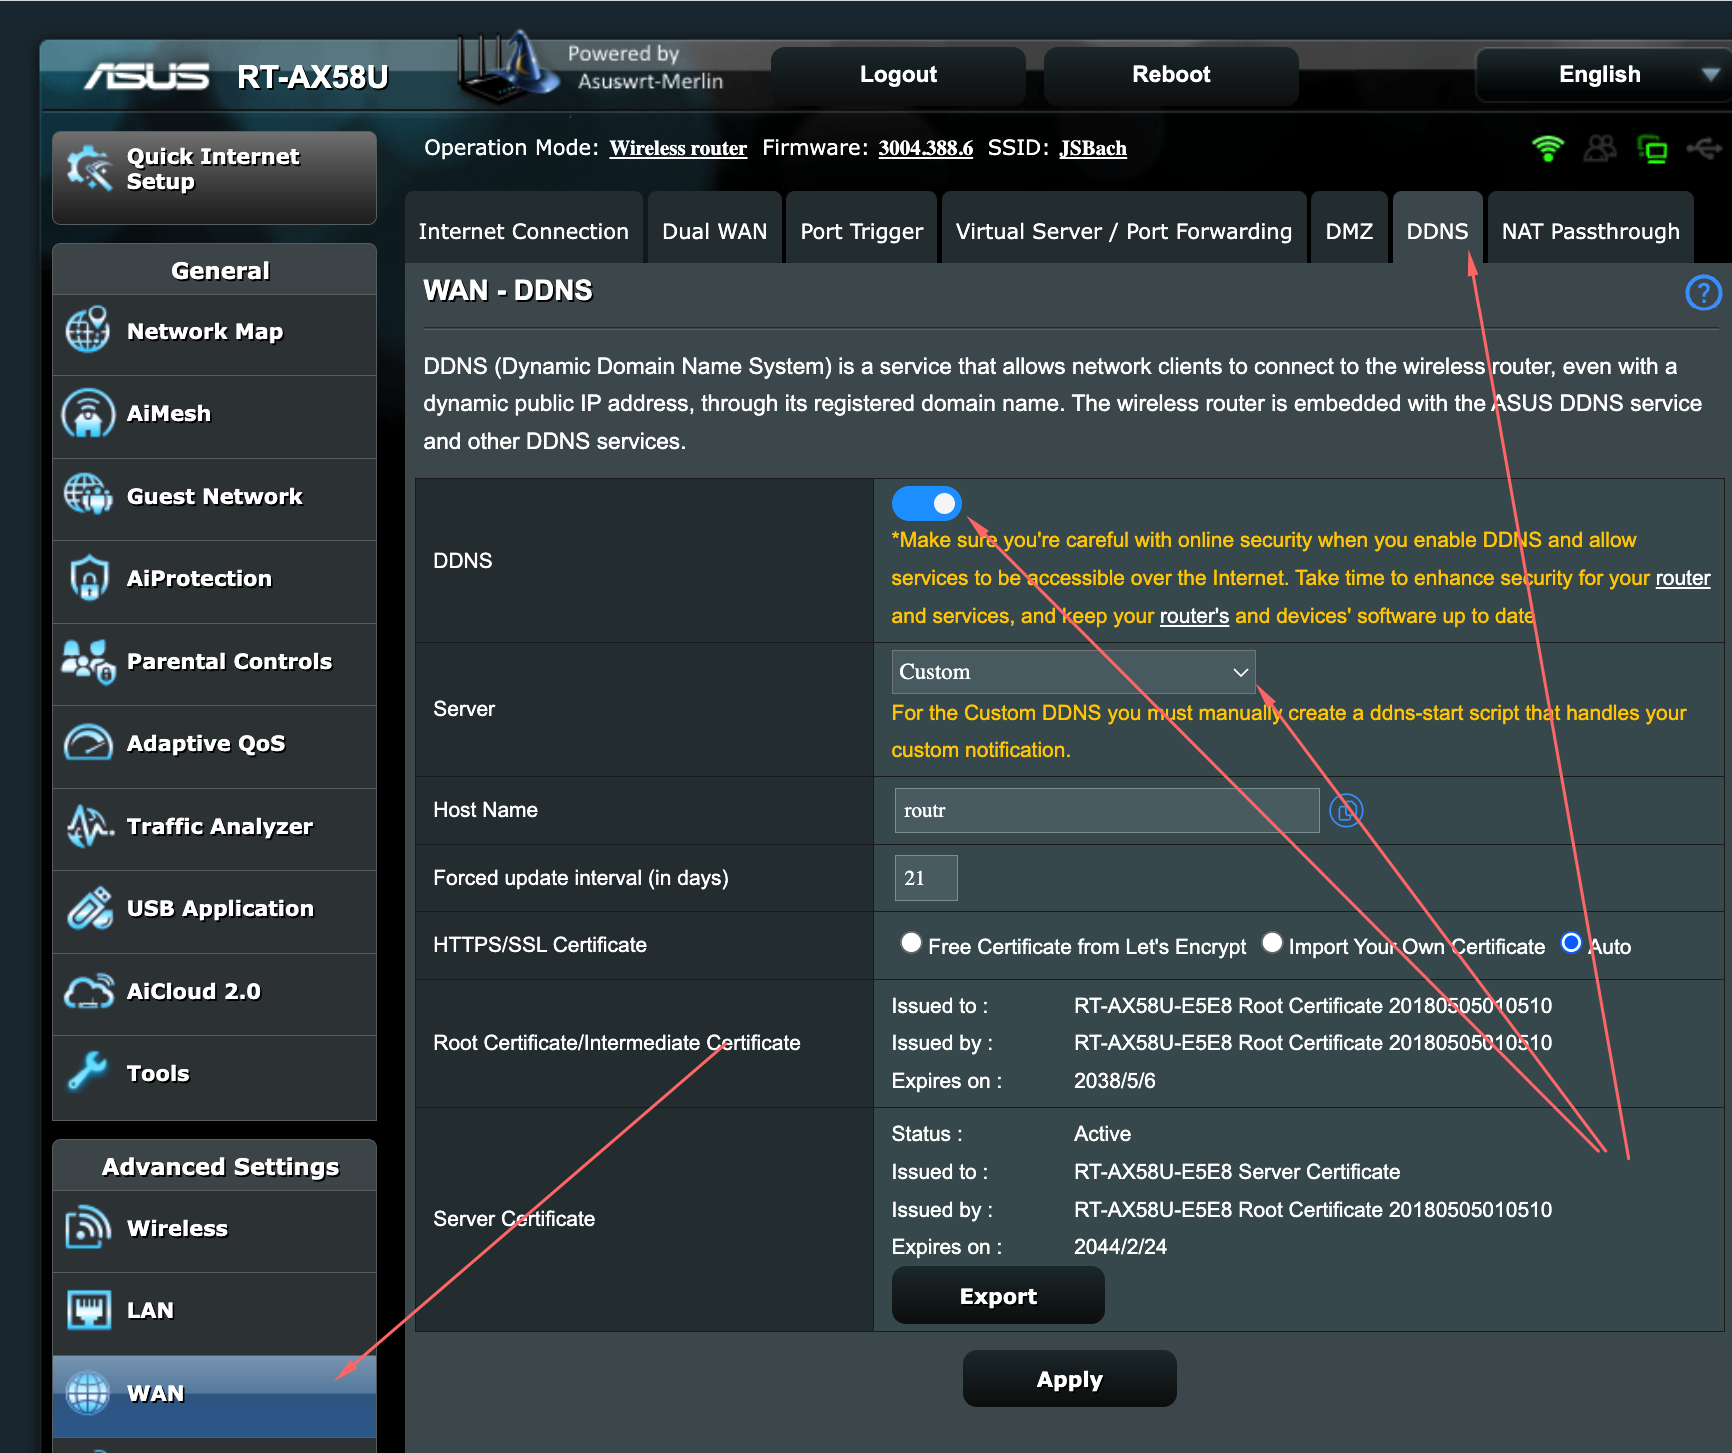
And here, the DDNS custom is enabled.
The router’s documentation specifies that it will automatically execute a shell script named ddns-start whenever it detects a change in the WAN address. This could be due to a system reboot or the end of a DHCP lease. The script must adhere to the following rules:
- It must be named
ddns-start. - It must be located at
/jffs/scripts/ddns-start. - It must have the execute permission set.
- It must call the
/sbin/ddns_custom_updatedprogram on the router with0as an argument to indicate success, or a positive number to indicate an error.
A DDNS update script
I use Linode, a cloud service provider, to manage my DNS. Linode provides a REST API for managing DNS records, which is exactly what we need for this task. While one usually makes changes to records through a web UI, in this case, we need to make the changes via a script. To call the update API, we need the name of the record, its ID, and the domain ID. You can find the API documentation at https://www.linode.com/docs/api/domains/.
Below is a script that can be used for this purpose. To use it, enable SSH on the router and connect to it using the command ssh -i [your ssh key] admin@192.168.1.1 -p 2222 (assuming the router is using port 2222). The router has the vi text editor installed, which you can use to create and edit the script.
mkdir -p /jffs/scripts
vi /jffs/scripts/ddns-start  (followed by editing)
chmod  +x /jffs/scripts/ddns-start
#!/bin/sh
#list records with
#curl -H "Authorization: Bearer token" \
#    https://api.linode.com/v4/domains/1926590/records | python -m json.tool | grep

# Get the record IDs manually
record_ids="33868122 22587997 22510612 32304964"
names="k8s site1 site2 site3"

new_ip=$(curl -s ifconfig.me)
echo $new_ip > /jffs/scrips/current_ip.txt

exit_code=0
index=1
for id in $record_ids
do
    name=$(echo $names | cut -d' ' -f$index)
    echo $name
    echo $new_ip
    curl -H "Content-Type: application/json" \
        -H "Authorization: Bearer token" \
        -X PUT -d "{
                \"name\": \"$name\",
                \"target\": \"$new_ip\",
                \"priority\": 0,
                \"weight\": 0,
                \"port\": 0,
                \"service\": null,
                \"protocol\": null,
                \"ttl_sec\": 600,
                \"tag\": null
        }" \
        https://api.linode.com/v4/domains/1926590/records/$id

    if [ $? -ne 0 ]; then
        exit_code=1
    fi
    echo ""
    index=$((index + 1))
done

/sbin/ddns_custom_updated $exit_code
echo "$(date) - IP changed to $new_ip" >> /jffs/scripts/ipchanges.txt
The ChatGPT explanation on how it works
I use the shell script to update DNS records on Linode’s DNS service. Here’s a step-by-step explanation:
- The script first defines a list of record IDs and corresponding names. These are the DNS records that the script updates. It then retrieves the current public IP address of the machine where the script is running using
curl -s ifconfig.me. This IP address is saved to a file/jffs/scripts/current_ip.txt. - The script then loops over each record ID in the
record_idsvariable. - For each record ID, it extracts the corresponding name from the
namesvariable. - It then makes a
PUTrequest to the Linode API to update the DNS record. The request includes a JSON payload that sets thenameandtarget(IP address) of the DNS record, among other parameters. - If the
curlcommand fails (returns a non-zero exit code), the script setsexit_codeto 1. We use this later to indicate whether any of the updates failed. - After all updates are done, the script calls
/sbin/ddns_custom_updated $exit_code. This seems to be a custom script that might do something based on whether the DNS updates were successful. - Finally, the script logs the new IP address and the current date to a file
/jffs/scripts/ipchanges.txt.
This script would be useful in a situation where your machine’s public IP address changes frequently (for example, if you have a dynamic IP address), and you need to keep your DNS records up to date with the current IP address.
Testing the script
You should validate the script by running it locally and checking if the DNS records update on the Linode website. For a practical test, reboot the router. This action should prompt the router to fetch a new WAN IP address and update the records on Linode. Once you update the records, the new record may take a few moments to propagate to the main DNS servers like Google and Cloudflare.
In the following post, we’ll explore the process of creating a k3d Kubernetes cluster.